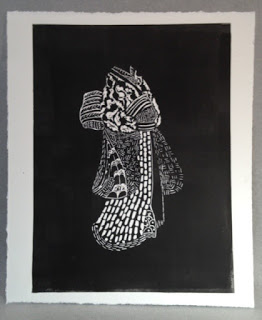
Two more print making techniques under my belt!!
| Ink and Markers |
When I knew I was accompanying my husband to Oregon I googled “art stores, classes, workshops”, etc and came across Atelier 6000 Printmaking Studio and Gallery atelier6000.org. I called and asked if they had any classes or workshops going on during the week I would be there. They didn’t – but they were able to work up a two day workshop to accommodate my schedule. I went prepared with reduced copies of things I could use (the above print being one). I swear – it couldn’t have been a better experience. If you get to visit ask to see the Vaquero Buckaroo book. They hand printed and stitched 75 copies, each residing in a Juniper wood box – totally awesome!
Back to the workshop:
The first day of my workshop I was taught printmaking – using inks, papers and the presses for making decorative paper (from sizes 5/7 up to 24 x 36). I applied inks to glass and then paper to the glass and then rolled it like a sandwich. The outcome was some really pretty paper. It was too “accidental” for me, so while it was an experience I would not have passed up – it’s probably one I won’t pursue further.
The second day I learned how to carve into Gomuban. A soft, easy to carve synthetic rubber used as a relief printing block. The Gomuban tile was glued to a piece of thin cardboard for ease in moving during printing. A reduced copy of the Kimono was used to make the tracing onto the Gomuban by putting a piece of red carbon paper behind it, then tracing the kimono and all it’s designs with a pencil. The carbon left a red outline on the Gomuban. Using their tools I carved away at the outlines (carved Gamuban on left above) to create my print (print on right above). The carved Kimono is approximately 10″ high. Because I wanted all the detail it took a little while – but the completed carving and printings were done in a day. I will definitely be trying this again.
What do you think?


