
Portfolio
Ya Hoo! I received my confirmation from Arrowmont of my upcoming class “Books-Leather Binding Thru The Ages” taught by Jana Pullman http://www.westernslopebindery.com/index.html I figured I should put aside my jewelry and sculpting supplies and bone up on book board and book making.
I chose to start off with a handmade portfolio that would house a lined pad, hold a pencil and have a pocket to hold ephemera. To start with, for inspiration, I cleared off all my work tables and brought out my books on making books. My “go to” book gal is Alisha Golden http://makinghandmadebooks.blogspot.com/ (I have all her books).
At any rate I found what I was looking for in Unique Handmade Books by Alisha Golden (pg 118)and changed it up to suit my needs and technical ability.

Supplies:
General bookmaking supplies (book board, PVA glue, general tools)
Lambskin tanned leather (picked up in a bargain bin in downtown Asheville, NC)
Blue paint specific to leather
12 x 12 (2 sheets) of adhesive backed fabric sold by The Paper Studio (I love the colors and have held on to these for over a year for just the right project)
Black 1″ Elastic and 1/2 of a suspender hook for closure
3 snap rivets from Tandy Leather
Variances unique to my portfolio:
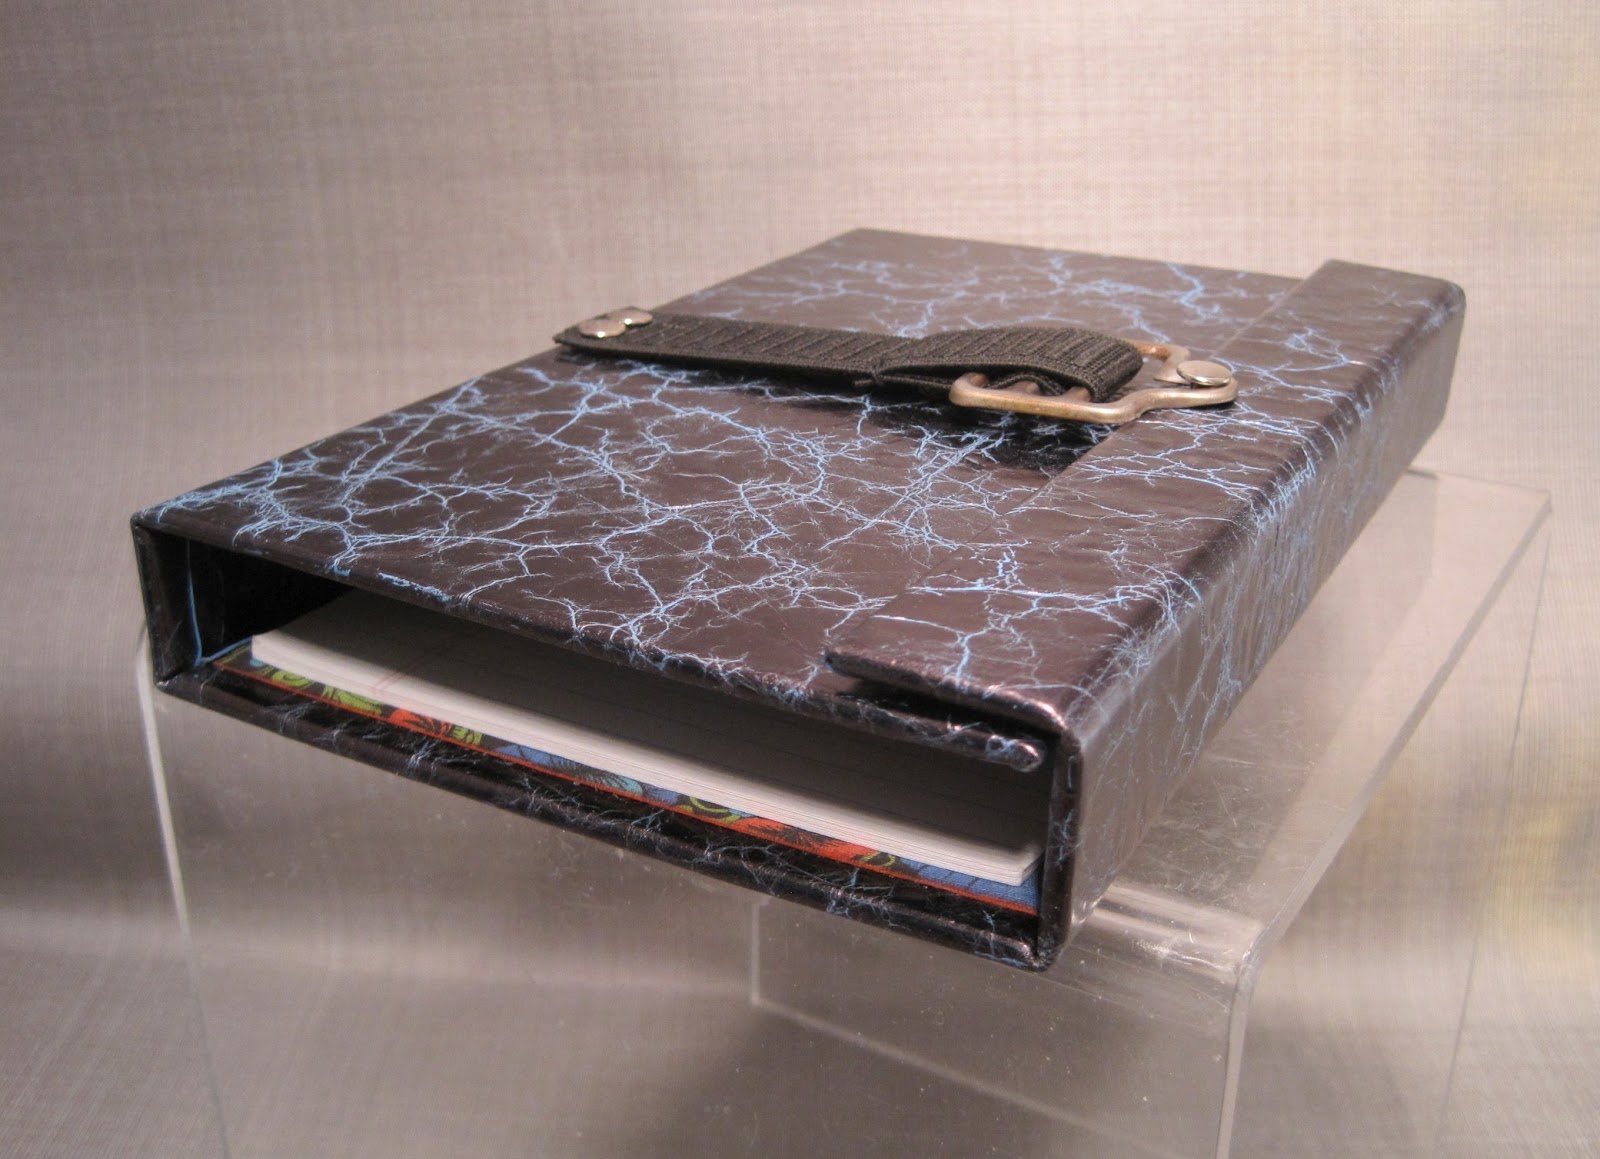
–I used leather vs paper. I have had the black distressed leather for some time and wanted to experiment using a soft leather.
–The leather was distressed during the tanning process. I wiped blue leather paint over the leather, let it set for two minutes and then wiped it off with a dry paper towel. I had to do this a couple of times to achieve the hue of blue I was looking for to remain in the veining.
 |
| Covered Portfolio – unpainted side on left – painted on right |
–I wanted to incorporate pockets directly into the lining of my portfolio vs adding them on top. So, I cut slits into the lining of the fabric where I wanted the pad to be inserted and where I wanted the left side ephemera pocket to be – gluing only the areas around the pockets.
–1/2″ elastic was used to hold in the pencils and an elastic closure vs ribbons.
These two variances took patience (the old saying measure twice, cut once came to mind many times).
 |
| Board: 5 1/2″, 7/8″, 5 1/2″, 1″, 1″ (all 8 3/4″ long) Hinges are 2 board widths |
 |
| This is the back side of the lining for the right side of the portfolio (sorry for the confusion) |
–Elastic to hold pencil: I positioned a piece of tag board on the board where I wanted the elastic to hold the pencil. I marked the position of the elastic, turned it over so the marks were on the bottom and put glue on the top – holding the tag board in position on the book board I gently laid the lining on top of it and pressed down. When I turned the lining over I was able to see where I needed to cut the slits in the lining for the elastic. The elastic was inserted and glued down (see black tabs in picture above).
–A piece of chip board the size of the back of the lined pad was cut off 1 3/4″ from the bottom, covered in packing tape (to prevent it from being glued in place) and inserted into the lining at the slit. All of the area with the exception of the large piece of book board was then glued with straight PVA glue, turned over (top to bottom) and put in place on the right side of the portfolio.
–The lining was smoothed in place with a bone folder – paying particular attention to the area surrounding the chipboard and the hinge areas. The chipboard was removed after about 5 minutes creating the pocket for the pad to slip into.
–The same method was used in covering and creating the left side lining and pocket.
 |
| The colors of this paper are vivid. The white papers indicate the areas slit open for pockets. |

–All raw edges of the lining (outer edges and pocket slits) were highlighted with an orange Copic marker and lightly glued to prevent future fraying.
–All exposed leather edges were painted the same blue as the veining accent.
–I left a little extra space between the bottom of the pad and the outer portfolio in case I wanted to tab a page for quick reference – it wouldn’t hang below the outside of the portfolio.
Cutting the boards was standard. Covering it and figuring out the lining to accommodate a pad and ephemera was a fly by the seat of my pants operation. Please comment or email me if you have any questions.
Happy Mother’s Day.
Janet