
Collapsible Box – Great Storage
This is a great container when traveling for a class. It folds flat so it doesn’t take up much room and assembles in seconds. It looks great when you take it out at class to hold your supplies while you work.
A very long time ago my Mother’s best friend Muriel gave her a vintage Asian collapsible box. When opened it made a pretty container for pencils, brushes, etc..
 |
| Vintage Collapsible Box: 6″ h x 5 1/4″ across |
I changed the number of panels and the size of the panels and made a few variations of the box. Here are a couple of the prototypes using scraps of mat board and painters tape.
 |
| Prototypes using mat board scraps and painters tape |
For this box I covered the outside of the panels in discarded paperback book covers (note – these books were destined, due to condition, to be recycled).
 |
| Box Open – 5″ h x 3 1/2″ across |
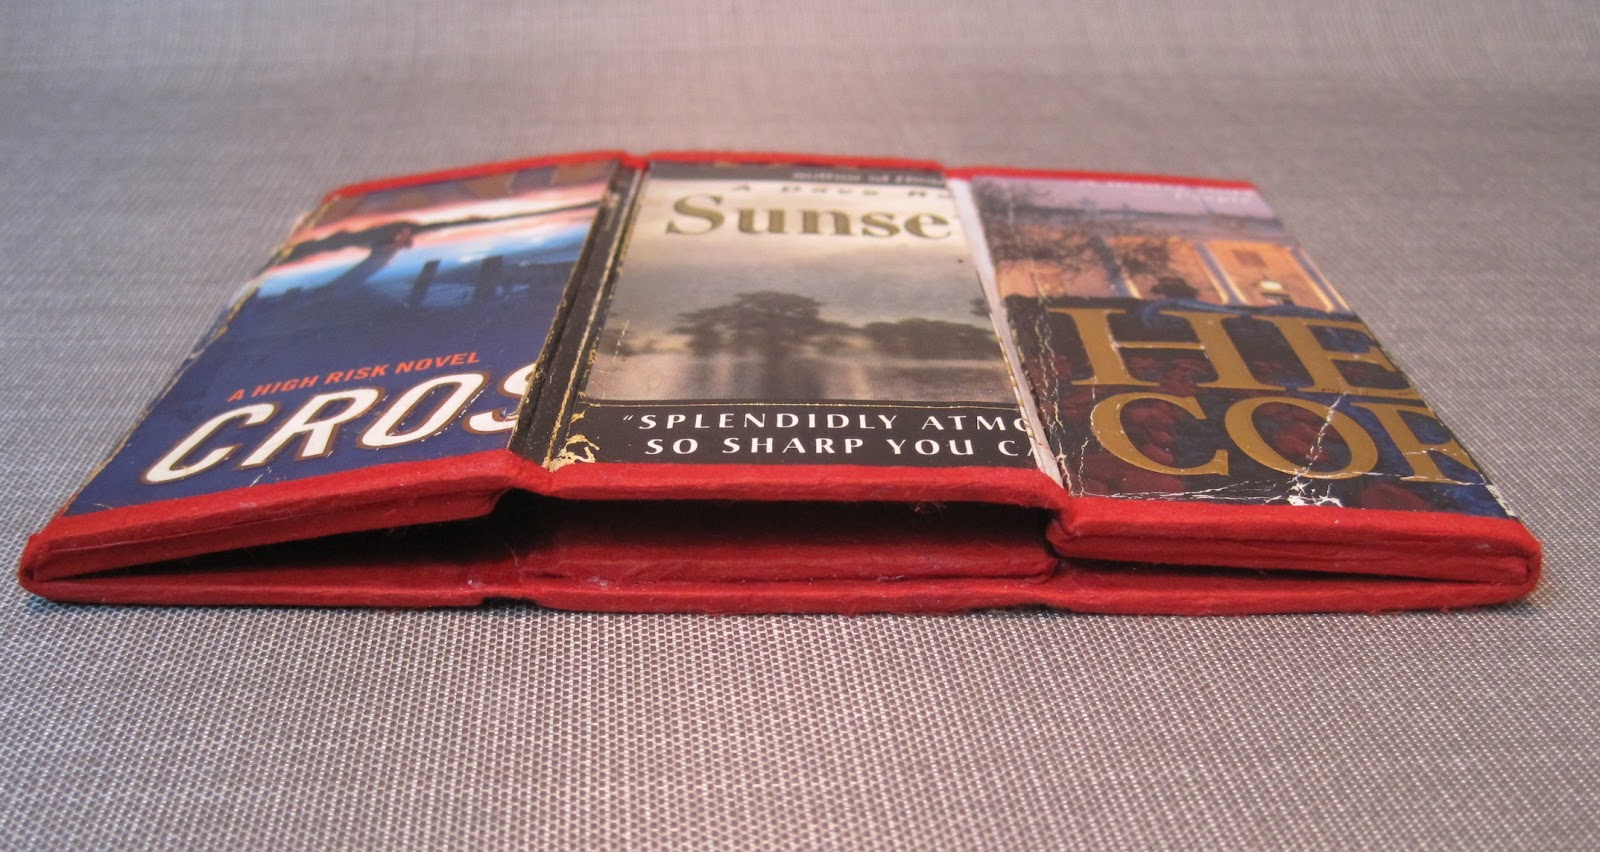 |
| Box Collapsed – 5″ h x 5 3/4″ |
Materials:
Mat board – Panels: 6 each 1 3/4″ x 5″ Floor: 1 hexagon Stops: 3 each 1/2″ x 1 1/4″
Lokta paper (hand made, strong, no grain) – 1 each at
PVA Glue
Book covers – 6
Process:
Accuracy in laying out the foundation is important for an easy closure.
 |
| After the panels have been glued to the lining paper. Top: Spacing Jig (three thicknesses of mat board) Middle: 6 mat board panels glued to inner red paper Bottom: 1/4″ brass rod |
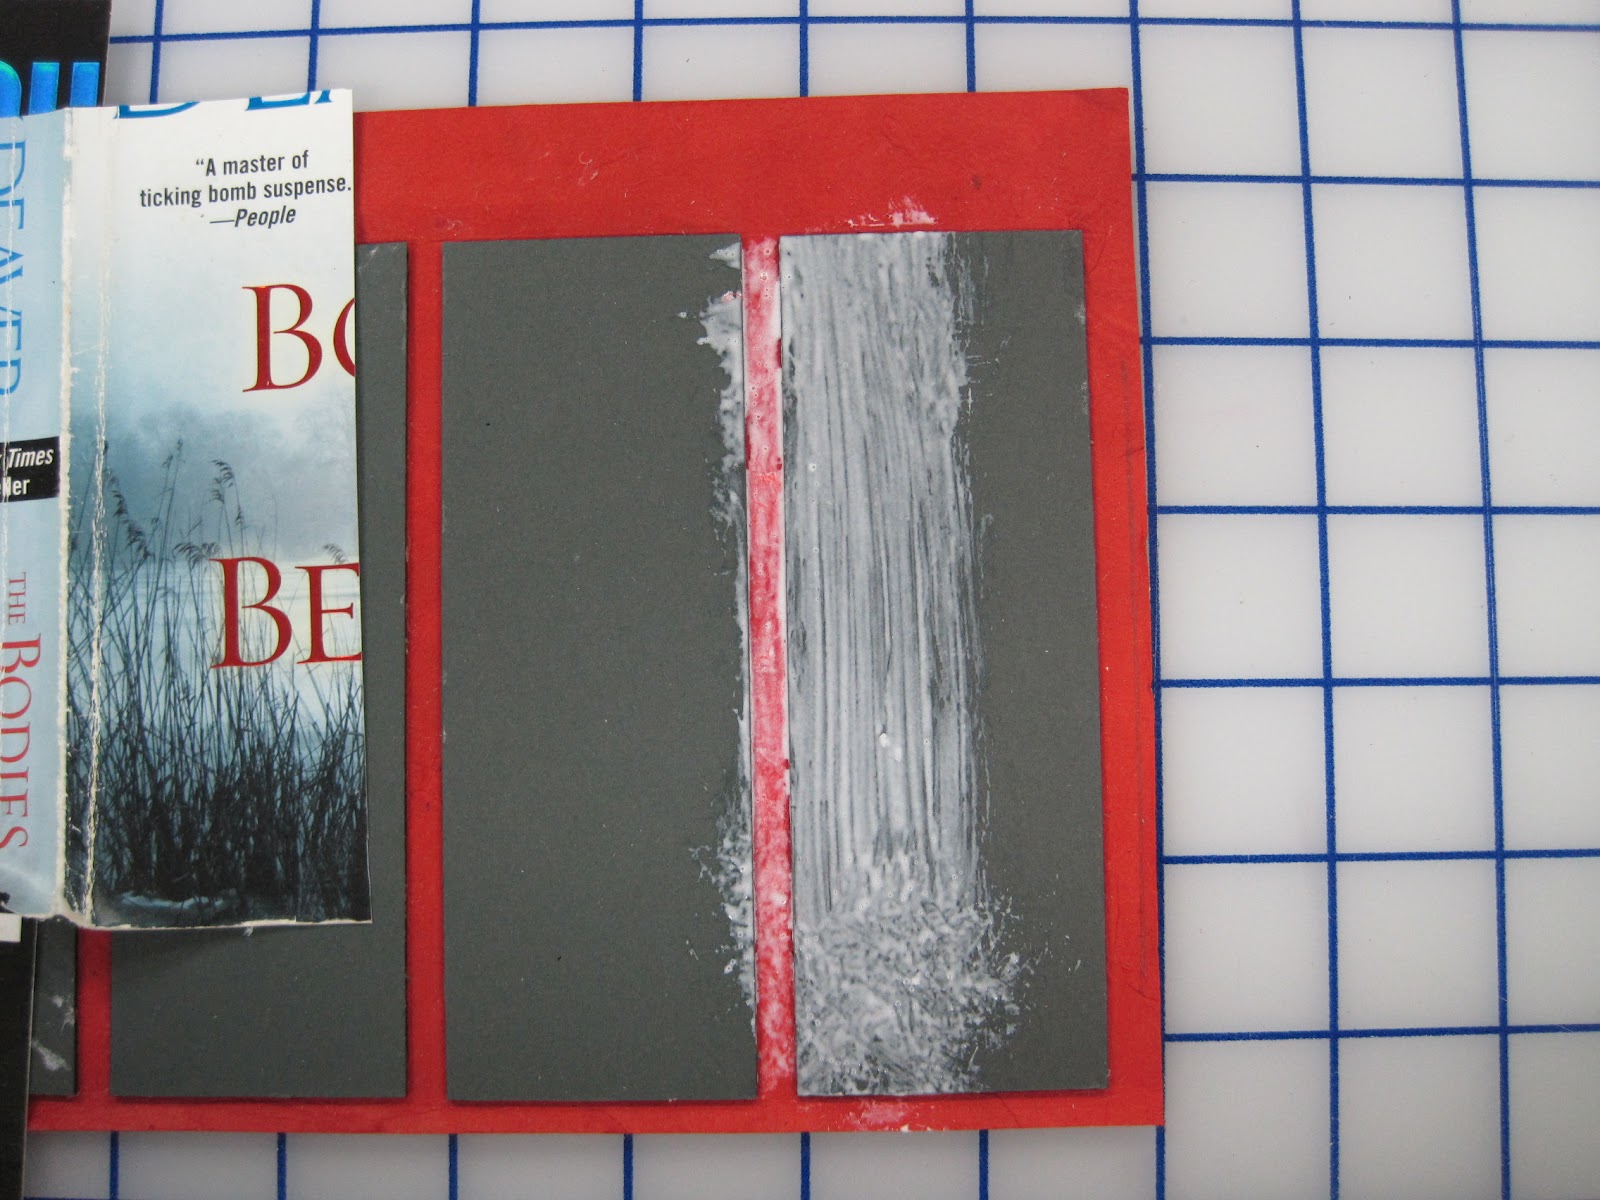
1. I placed my red lining paper against my square to maintain accuracy. I placed my 1/4″ copper tube at the bottom of the paper up against the square to maintain a 1/4″ space from the bottom of the paper to the bottom of the mat boards. You can draw a line 1/4′ up from the bottom if you don’t have a 1/4″ brass rod.
2. The 1 3/4″ x 5″ mat board panels were glued onto the red lining paper – making sure the boards were 1/4′ up from the bottom of the paper and, starting with the 2nd panel, 3 mat board widths between each panel. When the panels have been glued in place you can remove the square and jigs.
3. Cut the book covers as follows: Cut the cover beginning 1/2″ from the left side of the cover into the spine (see picture). This little bit of spine will cover the joints and extend a little onto the next panel. Then cut the cover 1 3/4″over to the right from the left side of the cover.

8. Begin gluing the covers on the panels from the right. Glue the left half of the far right panel and the right side of the next panel to the left. The small portion of the panel is left unglued until the structure is glued together at the end to form a circle.
You can see in the picture below that the far left cover hangs over by the width of the spine.


Your panels have been joined and there remains 1/4″ of paper extending from the bottom and 3/8″ extending from the top. Put glue on the paper and gently glue down over the front of the panels, turning the box as you go.
Cut a piece of the lining paper the size of your hexagon plus 1/2″ all the way around, leaving a long tab on one side (this will be your hinge).

Cover two of your stops in the lining paper. Glue them on the bottom of the inside of the box just 1/16″ up from the bottom (see below at the 7/8 o’clock and 4/5 o’clock positions).
Turn the edges of the floor lining paper over and glue in place.

Glue the last stop (attached to the floor). Fold over the tab of the red lining tab. Cut a
a piece of red lining the fit the bottom of the floor, glue in place.
This is easier than it looks and is easy to change. Some thoughts I haven’t gotten to yet…
** My daughter wrote a story when she was 8 titled “The Queen and Her Jewels” – complete with drawn pictures. I thought to copy the pictures and put them on the panels.
**This would be beautiful with copies of vintage letters glued to each panel.
**Postcards
**Etc, Etc..
Please email me if you have any questions or need clarification.
