
Christmas Cards – – WHAT WAS I THINKING?!
Note to Self on making this year’s Christmas Cards: WHAT THE HECK WERE YOU THINKING?!!
My muse really got me good this year. Usually I get the urge to do what my friends do so beautifully – make Christmas cards. I’ll make a card or two, they don’t look near as impressive as theirs do and I wind up sending my couple of cards to my Mom and Sisters (they love anything I do – that’s a benefit of family) and then send the rest store bought cards.
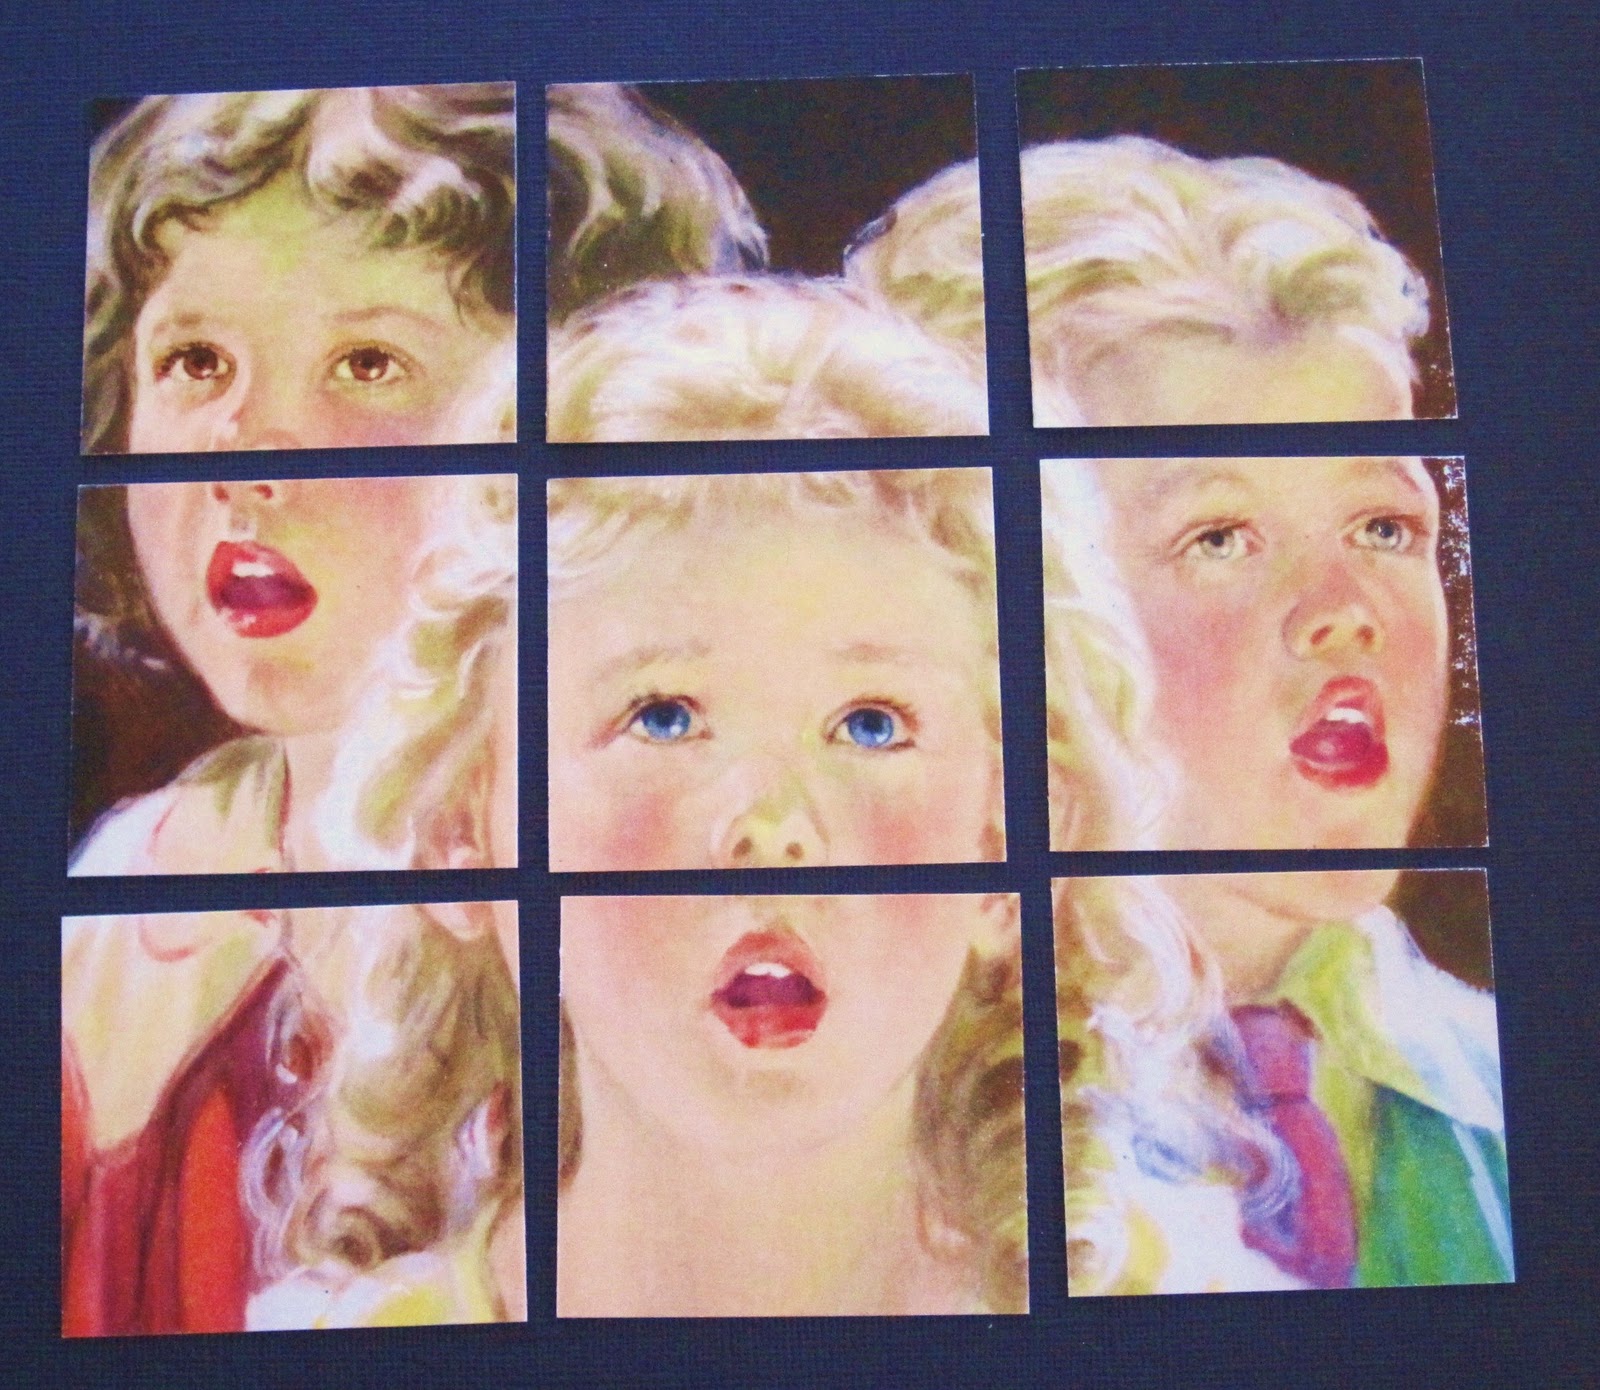
This year I took a flag book class from Karen Hanmer and thought the design, made smaller, would be a unique card. I chose to copy and reduce a vintage print – “Children Singing” by Eugene Iverd for the flags and vintage sheet music – “Good Tidings” by Freda Morrill Abrams for the cover.
Soooo, in for a penny (actually, lot’s of pennies) – in for a pound. The card, closed, is 4″ x 7″. The components are listed after the photos of the cards.
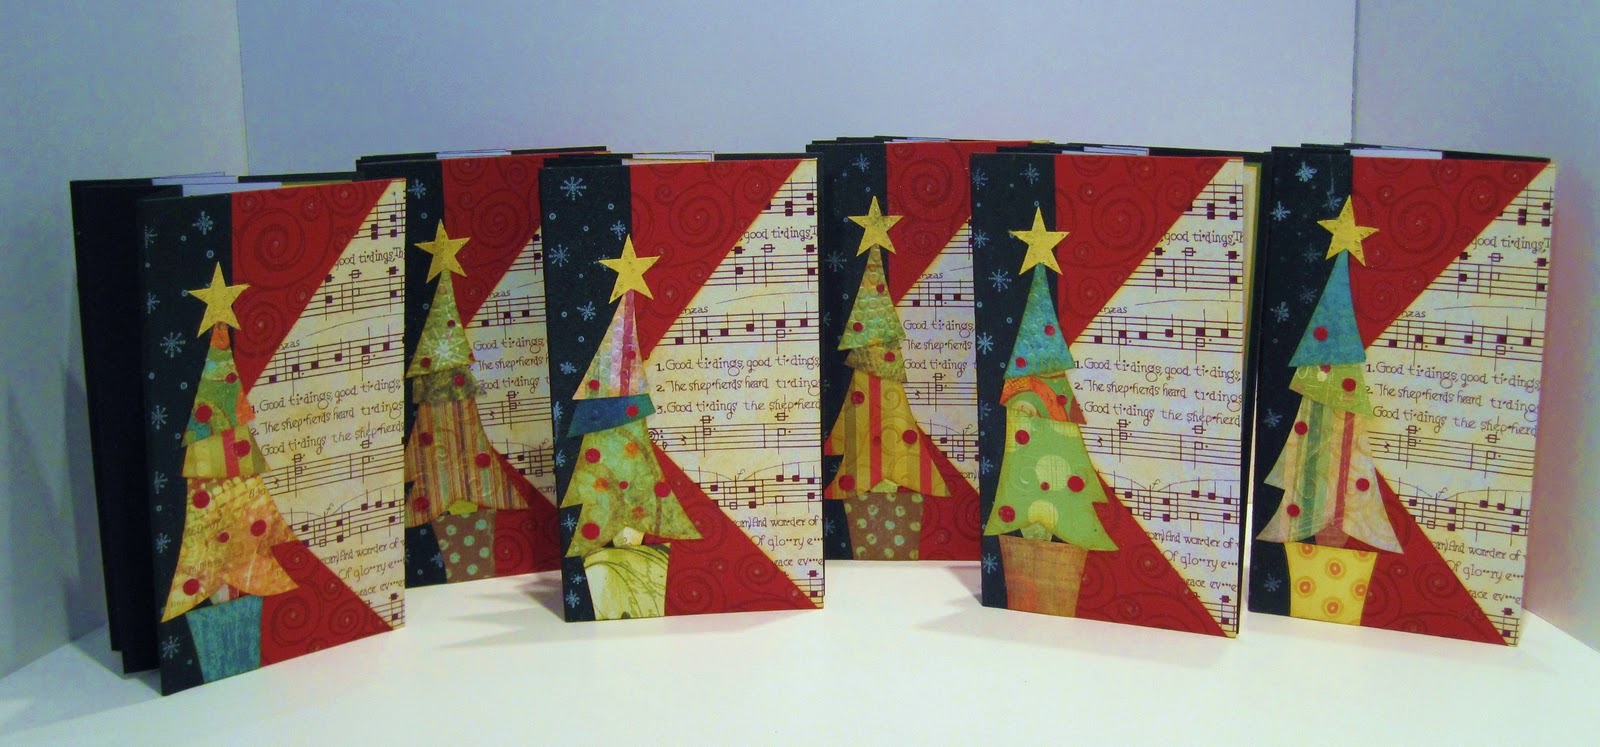 |
First Batch: The Tree on the front of each card is different.
 |

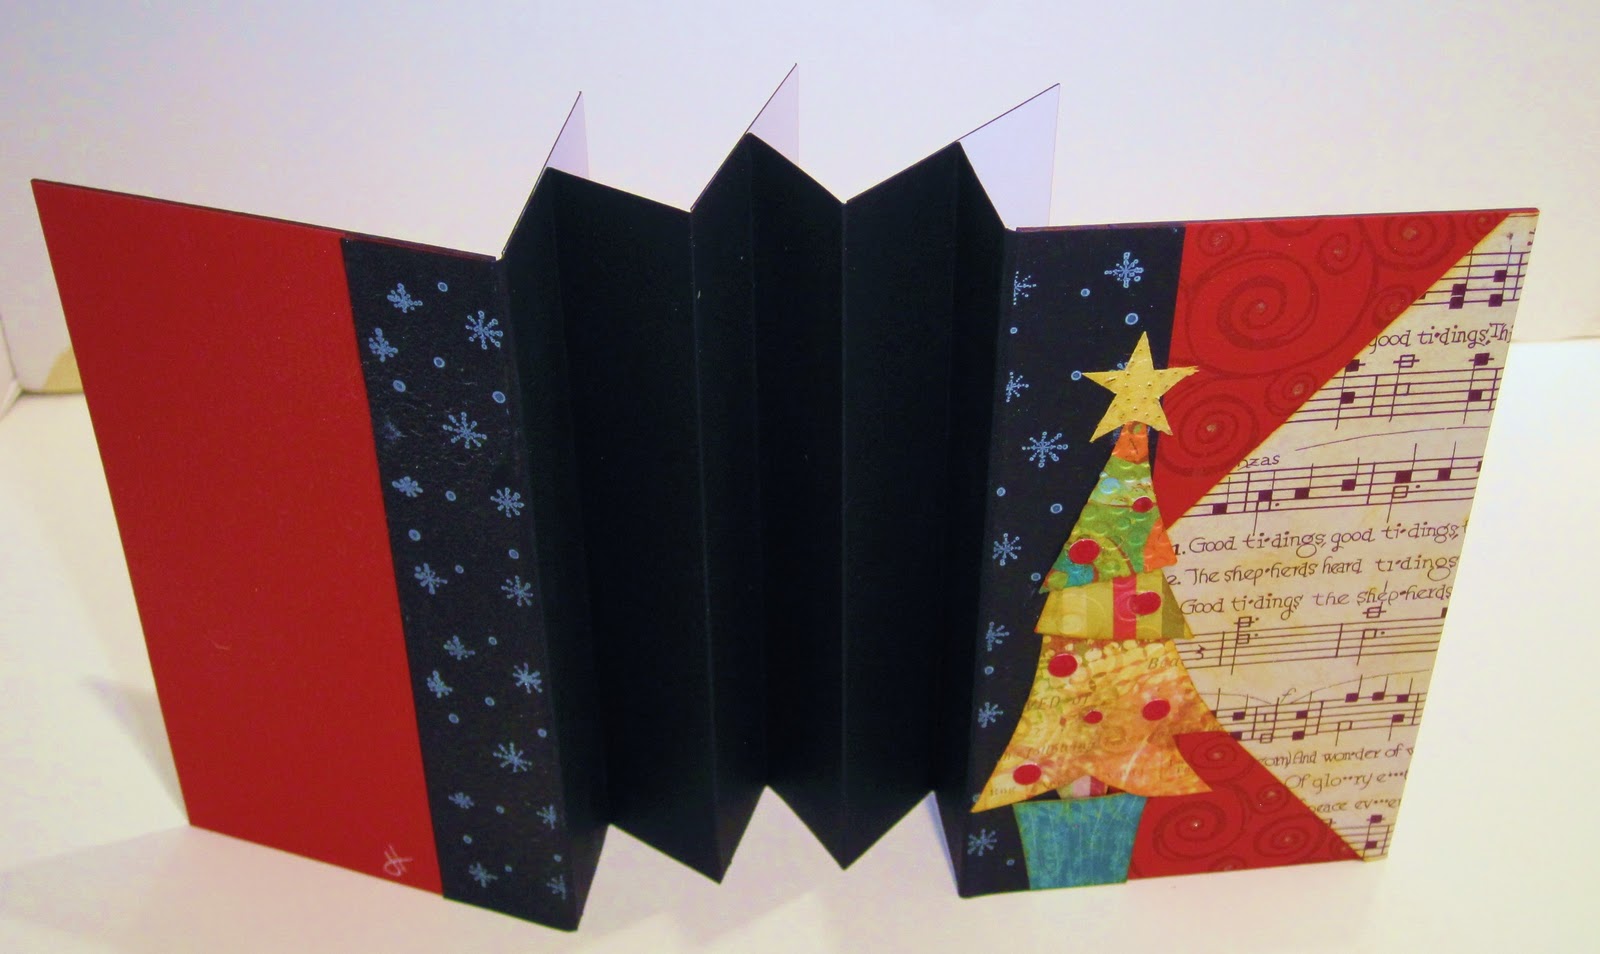
1. Mat board – red on one side black on the other with a black core was cut to 4″x7″ for the covers.

2. The swirl was stamped on at an angle using Grey Memento ink (I wanted to really BLING it up but held myself in check choosing instead to stamp the swirls in a subdued Grey color so it wouldn’t fight, visually, with the distressed sheet music and tree). The end of each swirl was highlighted with a silver glitter gel pen.
3. The picture was copied on white card stock and cut into 9 pieces. The edge of each piece was distressed using Distress Inks.
4. A 10 3/4″ x 7″ piece of Canson black paper was cut and folded lengthwise (each fold is 1/2 the width of the flag) to create an accordion
5. The flags were attached using double sided tape (1/16″ separates the flags).
6. The assembled picture and accordion were attached to the covers using double sided tape with the flaps overlapping to the outside of the covers.
7. The front and back covers got lightly sprayed with Glimmer Mist.
8. The copies of sheet music were cut to fit the front at a point and wrap around to the inside. The edges were distressed. The first one I glued down to the front cover using PVA glue. It caused the board to warp and I didn’t want to mess with it so I used spray glue on all the other cards. Worked like a charm.
9. Snow flakes were stamped on the black flaps using white Momentum Ink.
10. The Christmas trees were made from scraps of card stock using a Sizzix Die and distressed on all edges of each part of the tree. The smaller parts of the tree were glued down using the 2″ Xyron – the large part of the tree was glued using a PVA glue.
11. The inside sentiment was printed using an ink jet printer on card stock, distressed and the edge punched using an EK punch. It was backed by green card stock. All was glued in place using double sided tape.
I don’t get paid a penny for saying this but you have to know that being able to cut each component of this card to exact measurements was crucial for this project to be a success. I was able to do that because I used my Genesis Paper Trimmer.
Because the card was not bendable the post office considered it a package and postage was $1.71 each to mail. What a hoot.
I’m done, now I can work on a my 3 year old granddaughter’s trunk, filling it with magical princess and ballerina tu tu’s, wands and crowns.