
TA DONE! – Coptic End Bands
I hate to continue leading my posts with TA DA! but when I finally figure something out I just can’t help it.
 |
| Coptic End Band |
 |
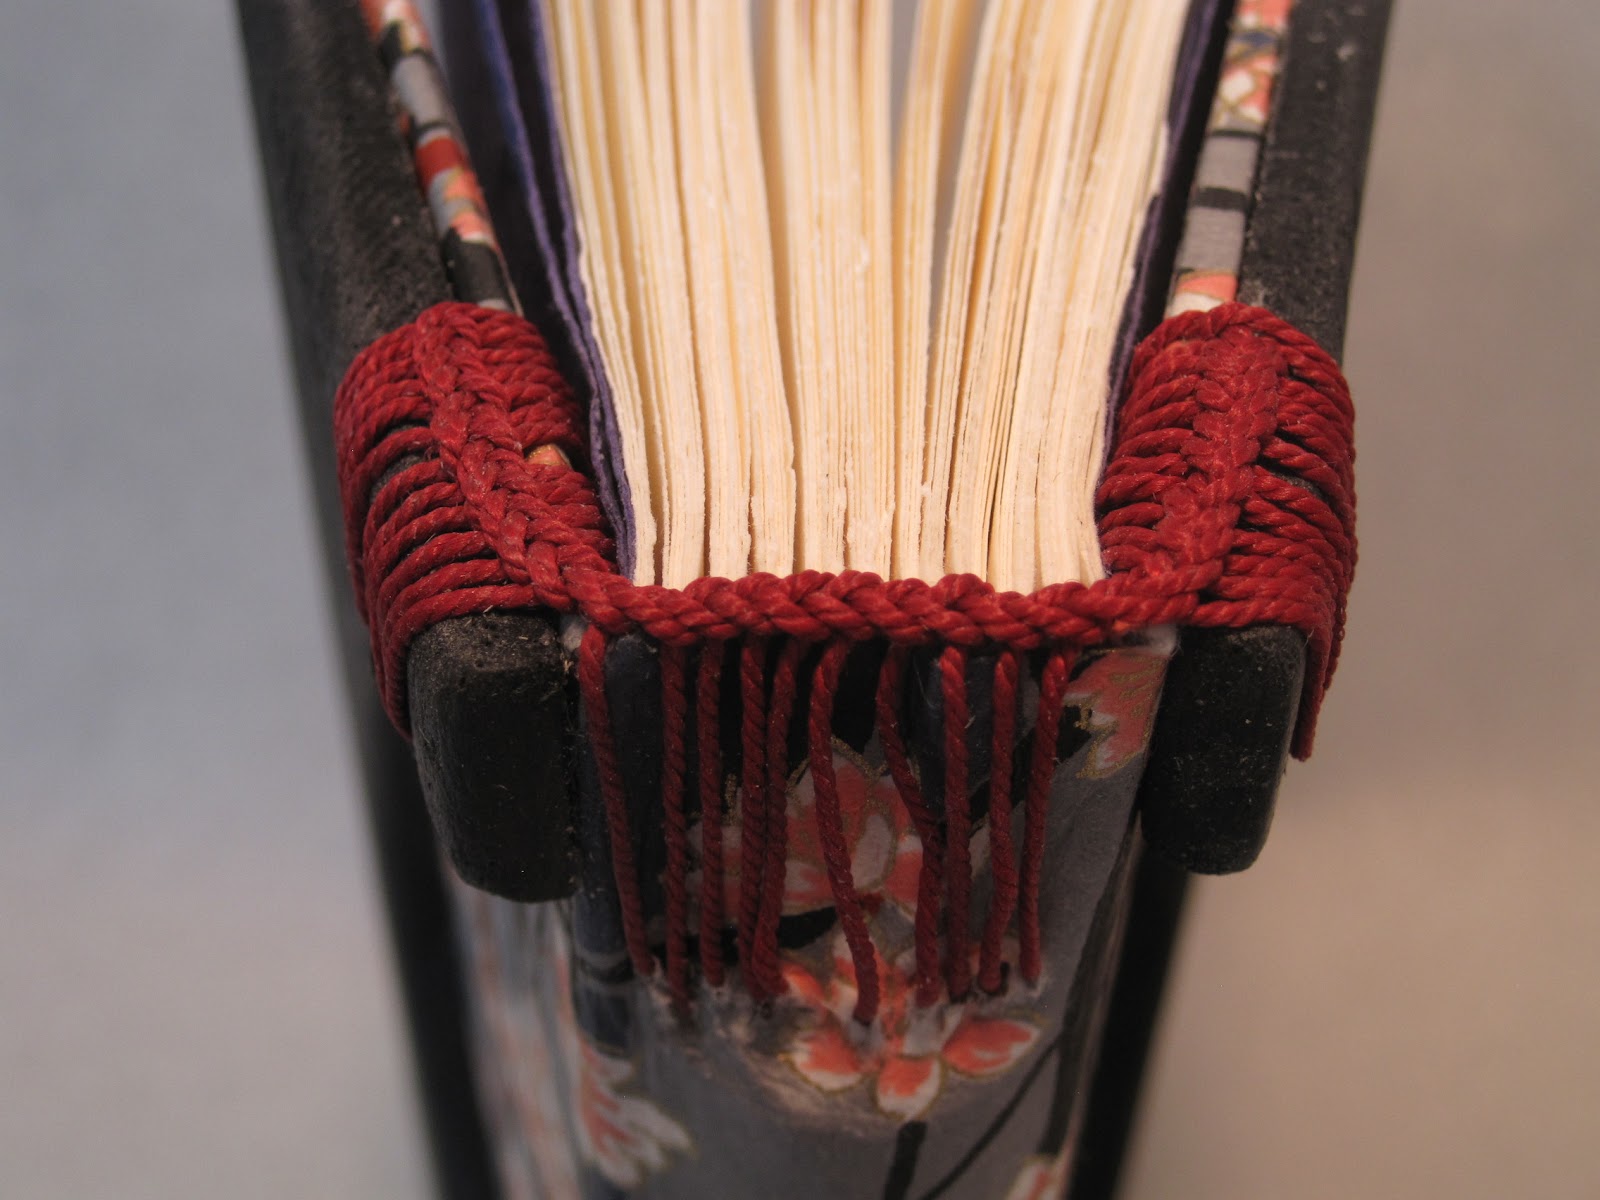
| In the beginnin….7 1/2″ x 5″ – 11 signatures – 4 sheets/8 pages |
Susan, our instructor for teaching the Coptic End Band technique, brought text blocks for us to keep and practice on (this was very generous).
This stitch is frustrating. And while I eventually “got it” I didn’t like the looks of it. So I took it apart and decided I needed the solitude of my studio (and probably a couple of days) to figure it out so I took it home to conquer.
A couple items to note:
– The size of the thread and degree of waxing on the thread makes a difference in the appearance and workability of the Coptic End Band. I changed from a heavily waxed linen thread to a lesser waxed and more rounded thread and it made a big difference.
– The width of the board also makes a difference. The wider the board the better to see the stitches (good or bad). I’m sure with experience it may not matter so much.
– This size book took 91″ of thread per end! I ran out of my first length of the Burgundy (hence the blue on the bottom) about 2/3 the way thru the top stitching. I had enough on hand to just finish the top, adding it via a weaver’s knot in one of the last signatures before proceeding to the back cover.
– Being brand new to this – I discovered I really needed to concentrate – without distractions (like TV, music, most beloved husband, etc.).

I couldn’t leave well enough alone…
– I cut and rounded a strip of Balsa Wood, just long enough to fit the spine between the chain stitches and covered it with a piece of card stock. This was glued to the center of the Japanese paper.
– The Japanese paper was glued to the covers, over the spine, beginning 1 11/16″ from the fore edge of the front cover – using PVA glue.
– I cut and shaped two pieces of 1/4″ balsa wood for the front and back covers.
– Balsa Wood is very soft and easily marred. To circumvent any noticeable dings in the future, I used a decorative hammer to mark it up after painting the wood with black acrylic.
– The wood pieces were glued to the covers, over the Japanese papaer, matching up at the edge of the spine extending towards the fore edge about 3 3/8″. I used Ultimate Glue.
– I drew the dragonfly with Prismacolor black pens, colored it with colored pencils and spritzed the drawing with FW shimmering acrylic ink.
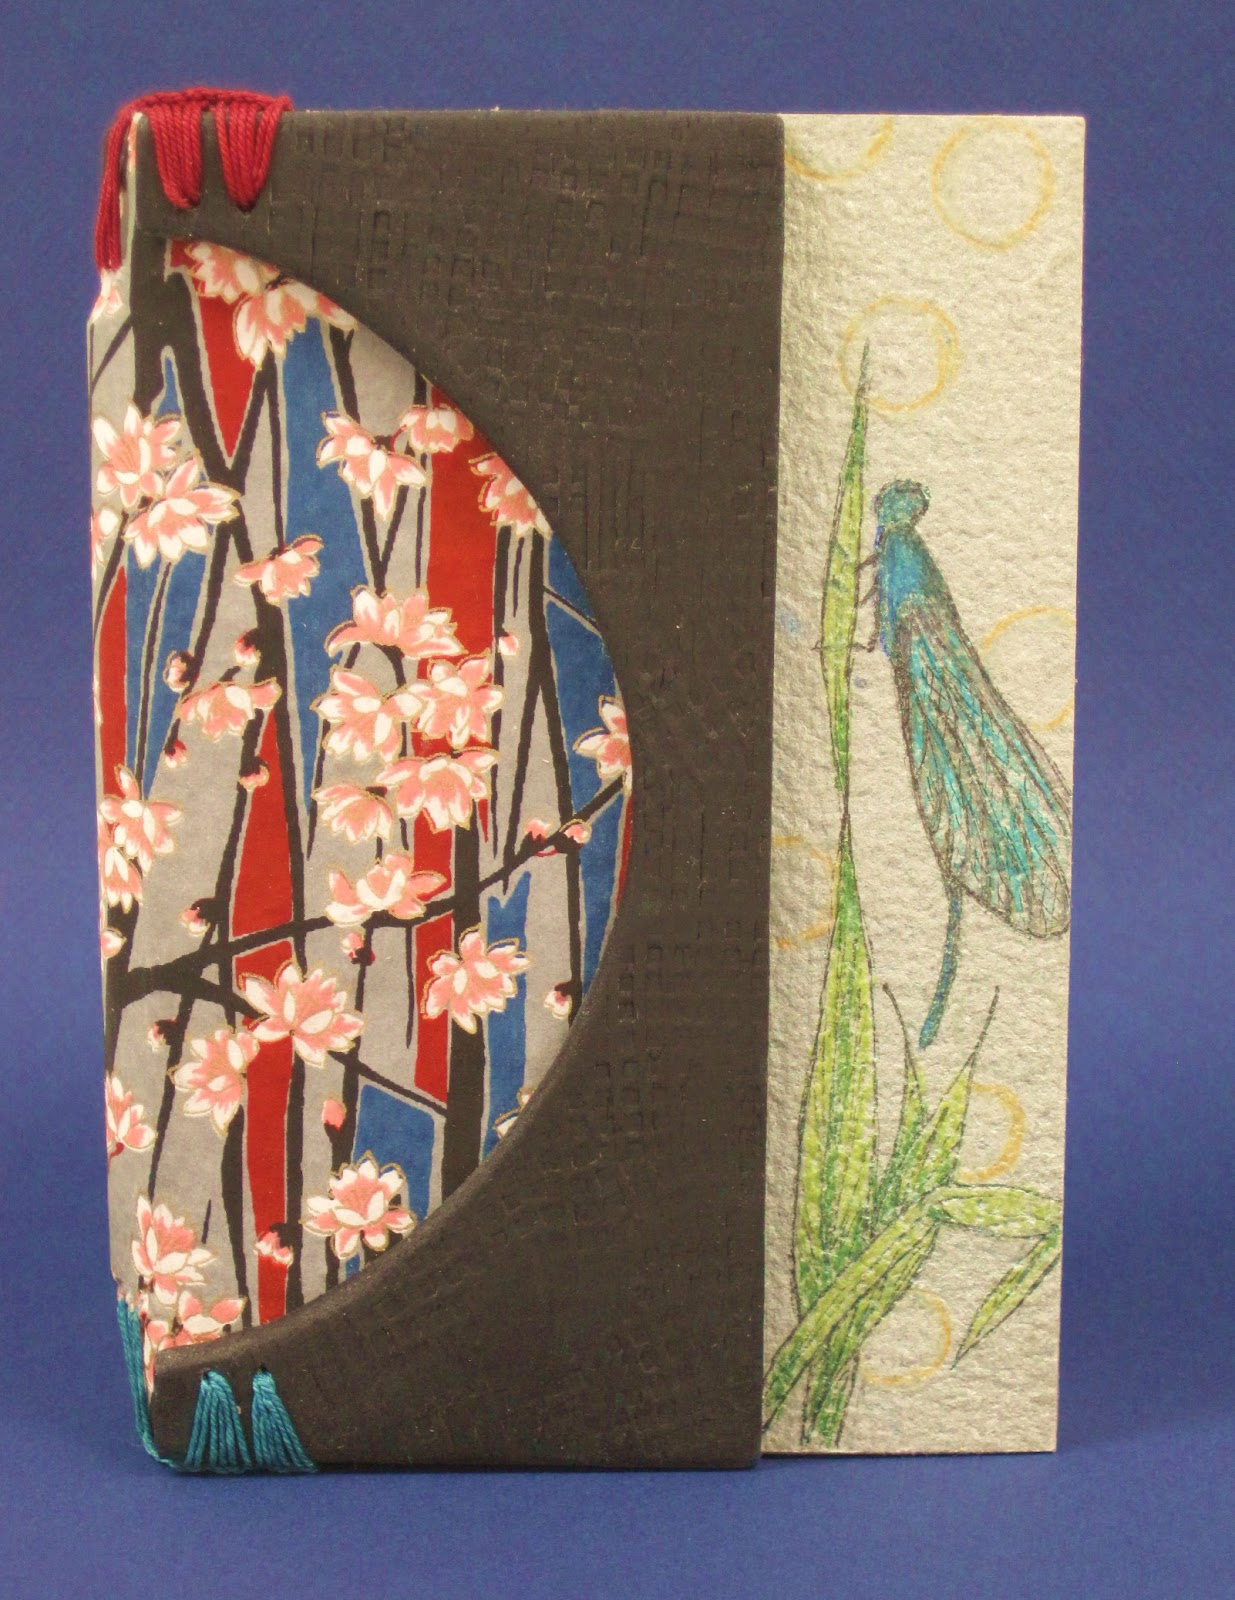
Had I been as concerned with design as I had been about conquering the Coptic End Band I probably would have continued the black branches from the Japanese paper pattern over to the drawing for the dragonfly vs green vegetation – duh.
AND – in hindsight I wouldn’t have experimented with rounding the spine between the chain stitches. It caused a little tearing in the paper where the thread comes thru.
TA DONE!